> ## Documentation Index
> Fetch the complete documentation index at: https://vectorpeak.cn/llms.txt
> Use this file to discover all available pages before exploring further.
# LangGraph Ecosystem
> 介绍 LangGraph 生态工具的协作方式
## 1. LangGraph全家桶使用
Written: 2026.06
## 2. 全家桶组件介绍
### 2.1 LangGraph
### 2.2 LangSmith
平台化工具,用于 调试、观测、评估 LangChain / LangGraph 应用。可以记录运行轨迹、比较不同版本、做回放和质量评估
### 2.3 LangGraph Studio
一个 可视化 IDE,支持拖拽式创建/修改 LangGraph 流程,实时运行和调试节点逻辑。对非纯代码开发者特别友好
### 2.4 LangGraph CLI
命令行工具,用来 初始化项目、运行、部署 LangGraph 应用。比如 `langgraph dev` 本地调试,`langgraph deploy` 一键上云
### 2.5 Agent Chat UI
一个现成的 聊天前端(React + Tailwind),直接对接 LangGraph Agent 服务,用来展示对话、思维链、工具调用等
> LangGraph 提供了开发框架,LangSmith 做监控和评估,Studio 做可视化构建,CLI 管理项目和部署,Agent Chat UI 提供用户界面 —— 一套从开发到调试、部署、交互的完整闭环
## 3. 创建LangGraph智能体项目
### 3.1 创建项目
使用 uv 工具创建一个 langgraph 项目,uv 具体使用可参考文档:[https://www.cuiliangblog.cn/detail/section/228701279](https://www.cuiliangblog.cn/detail/section/228701279)
### 3.2 注册LangSmith
为了更好的监控智能体实时运行情况,我们可以考虑借助LangSmith进行追踪(会将智能体运行情况实时上传到LangGraph官网并进行展示)。具体使用可参考文档:[https://www.cuiliangblog.cn/detail/section/229848724](https://www.cuiliangblog.cn/detail/section/229848724)
### 3.3 创建相关文件
```text title="环境变量配置(.env)示例" icon="file" wrap theme={null}
LANGSMITH_TRACING="true"
LANGSMITH_ENDPOINT="https://api.smith.langchain.com"
LANGSMITH_API_KEY='你注册的langsmith api key'
LANGSMITH_PROJECT='你注册的项目名称'
OPENWEATHER_API_KEY="天气助手API KEY"
```
```python title="自定义工具函数(tools.py)示例" icon="python" wrap expandable theme={null}
import json
import os
import httpx
import dotenv
from loguru import logger
from pydantic import Field, BaseModel
from langchain_core.tools import tool
# 加载环境变量配置
dotenv.load_dotenv()
class WeatherQuery(BaseModel):
"""
天气查询参数模型类,用于定义天气查询工具的输入参数结构。
:param city: 城市名称,字符串类型,表示要查询天气的城市
"""
city: str = Field(description="城市名称")
class WriteQuery(BaseModel):
"""
写入查询模型类
用于定义需要写入文档的内容结构,继承自BaseModel基类
属性:
content (str): 需要写入文档的具体内容,包含详细的描述信息
"""
content: str = Field(description="需要写入文档的具体内容")
@tool(args_schema=WeatherQuery)
def get_weather(city):
"""
查询指定城市的即时天气信息。
:param city: 必要参数,字符串类型,表示要查询天气的城市名称。
注意:中国城市需使用其英文名称,如 "Beijing" 表示北京。
:return: 返回 OpenWeather API 的响应结果,URL 为
https://api.openweathermap.org/data/2.5/weather。
响应内容为 JSON 格式的字符串,包含详细的天气数据。
"""
# 构建请求 URL
url = "https://api.openweathermap.org/data/2.5/weather"
# 设置查询参数
params = {
"q": city, # 城市名称
"appid": os.getenv("OPENWEATHER_API_KEY"), # 从环境变量中读取 API Key
"units": "metric", # 使用摄氏度作为温度单位
"lang": "zh_cn" # 返回简体中文的天气描述
}
# 发送 GET 请求并获取响应
response = httpx.get(url, params=params)
# 将响应解析为 JSON 并序列化为字符串返回
data = response.json()
logger.info(f"查询天气结果:{json.dumps(data)}")
return json.dumps(data)
@tool(args_schema=WriteQuery)
def write_file(content):
"""
将指定内容写入本地文件
参数:
content (str): 要写入文件的文本内容
返回值:
str: 表示写入操作成功完成的提示信息
"""
# 将内容写入res.txt文件,使用utf-8编码确保中文字符正确保存
with open('res.txt', 'w', encoding='utf-8') as f:
f.write(content)
logger.info(f"已成功写入本地文件,写入内容:{content}")
return "已成功写入本地文件。"
```
```python title="主程序(main.py)示例" icon="python" wrap theme={null}
from langchain_ollama import ChatOllama
from tools import get_weather, write_file
from langgraph.prebuilt import create_react_agent
# 初始化本地大语言模型,配置基础URL、模型名称和推理模式
llm = ChatOllama(base_url="http://localhost:11434", model="deepseek-r1:8b", reasoning=False)
# 定义工具列表,包含天气查询、写入文件工具
tools = [get_weather, write_file]
# 创建ReAct代理,结合语言模型和工具函数
agent = create_react_agent(model=llm, tools=tools)
```
```json title="LangGraph 配置文件(langgraph.json)示例" icon="file" wrap theme={null}
{
"dependencies": [
"./"
],
"graphs": {
"chatbot": "./main.py:agent"
},
"env": ".env"
}
```
`dependencies`: 依赖路径数组,“./”: 表示当前目录为依赖源
`graphs`: 执行图配置对象,chatbot: 图名称,对应./main.py文件中的agent函数作为聊天机器人入口点
`env`: 环境变量配置文件路径,“.env”: 指定使用当前目录下的.env文件作为环境变量配置源 \*/
### 3.4 安装langgraph-cli 并启动项目
执行`pip install -U "langgraph-cli[inmem]"`命令安装langgraph-cli 工具
执行`langgraph dev`命令启动项目,启动之后可以看到三个链接,第一个链接是当前部署完成后的服务端口,第二个是LangGraph Studio的可视化页面,其中第三个端口是端口的说明文档
```console title="执行结果如下" icon="terminal" wrap theme={null}
# langgraph dev
INFO:langgraph_api.cli:
Welcome to
╦ ┌─┐┌┐┌┌─┐╔═╗┬─┐┌─┐┌─┐┬ ┬
║ ├─┤││││ ┬║ ╦├┬┘├─┤├─┘├─┤
╩═╝┴ ┴┘└┘└─┘╚═╝┴└─┴ ┴┴ ┴ ┴
- 🚀 API: http://127.0.0.1:2024
- 🎨 Studio UI: https://smith.langchain.com/studio/?baseUrl=http://127.0.0.1:2024
- 📚 API Docs: http://127.0.0.1:2024/docs
This in-memory server is designed for development and testing.
For production use, please use LangGraph Platform.
```
## 4. 全家桶使用
### 4.1 查看接口文档
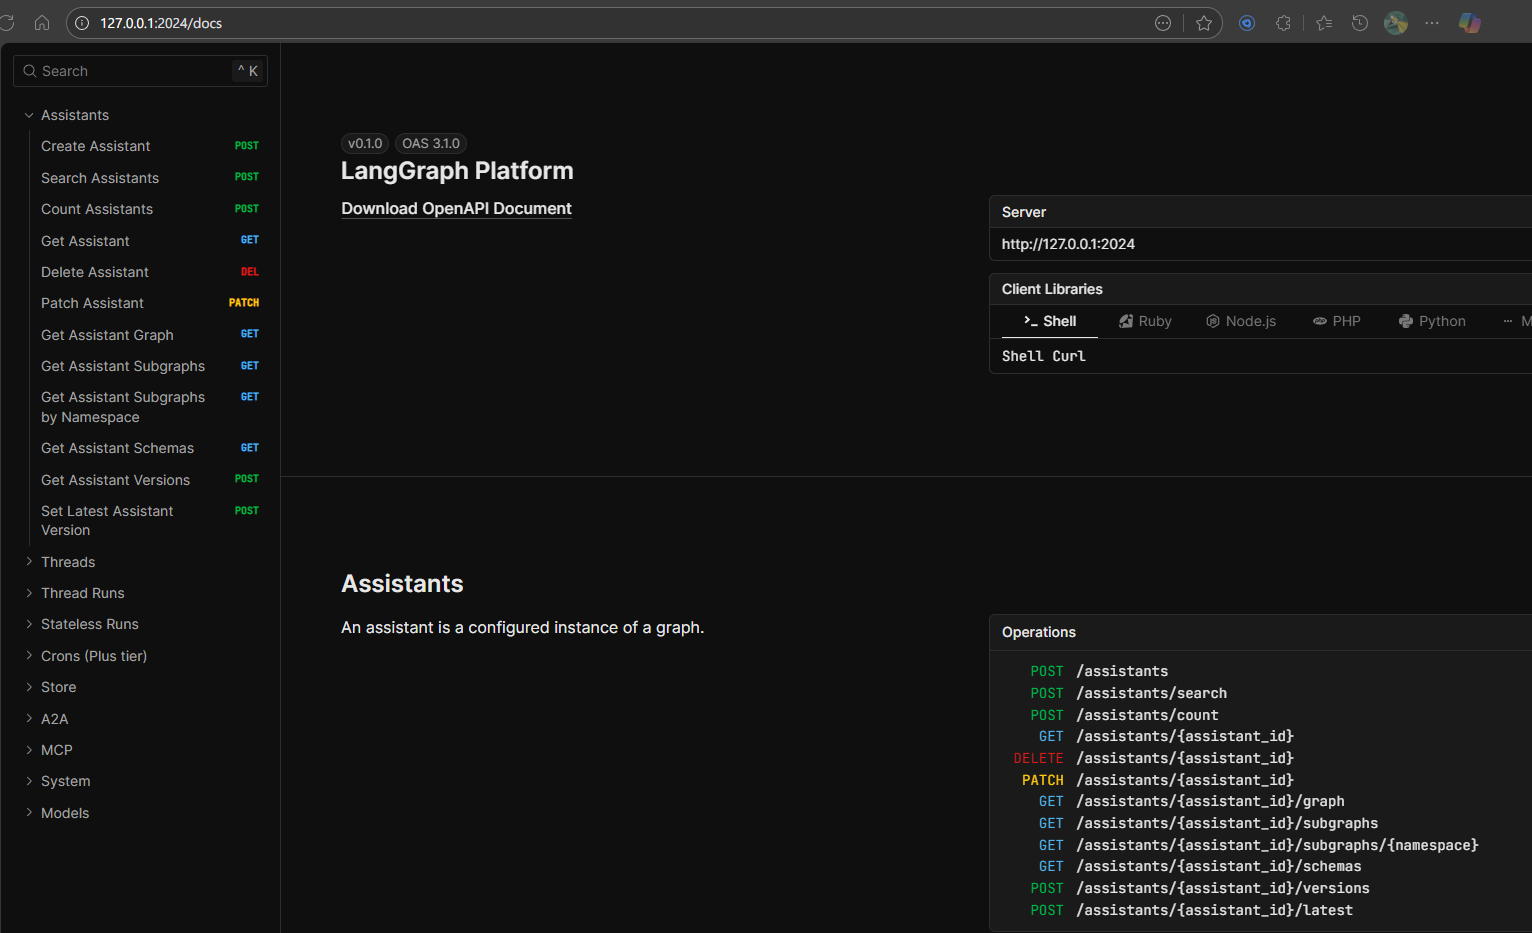
访问[http://127.0.0.1:2024/docs](http://127.0.0.1:2024/docs)即可查看接口文档
 ### 4.2 LangGraph Studio 可视化调试
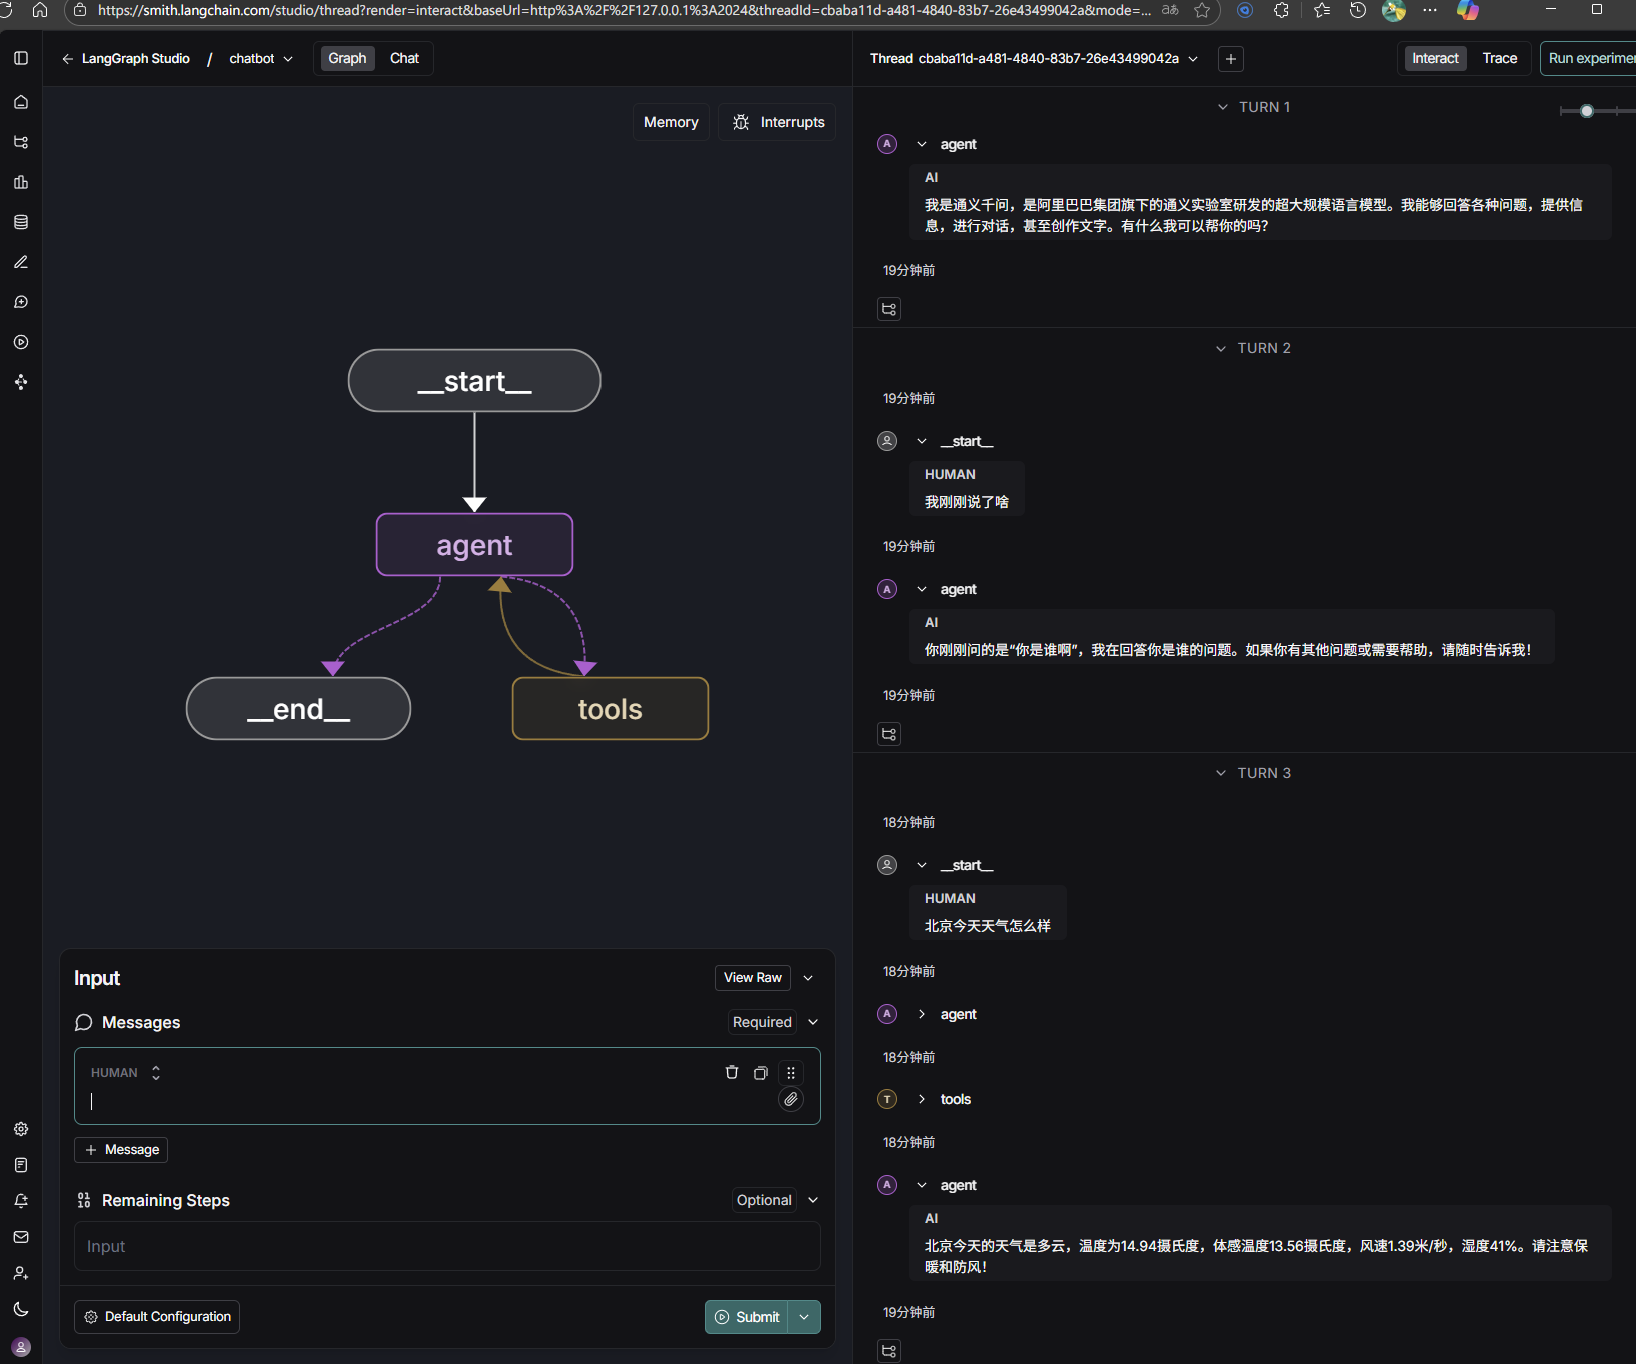
访问[https://smith.langchain.com/studio/?baseUrl=http://127.0.0.1:2024](https://smith.langchain.com/studio/?baseUrl=http://127.0.0.1:2024)既可在 web 页面调试
### 4.2 LangGraph Studio 可视化调试
访问[https://smith.langchain.com/studio/?baseUrl=http://127.0.0.1:2024](https://smith.langchain.com/studio/?baseUrl=http://127.0.0.1:2024)既可在 web 页面调试
 ### 4.3 LangSmith 追踪
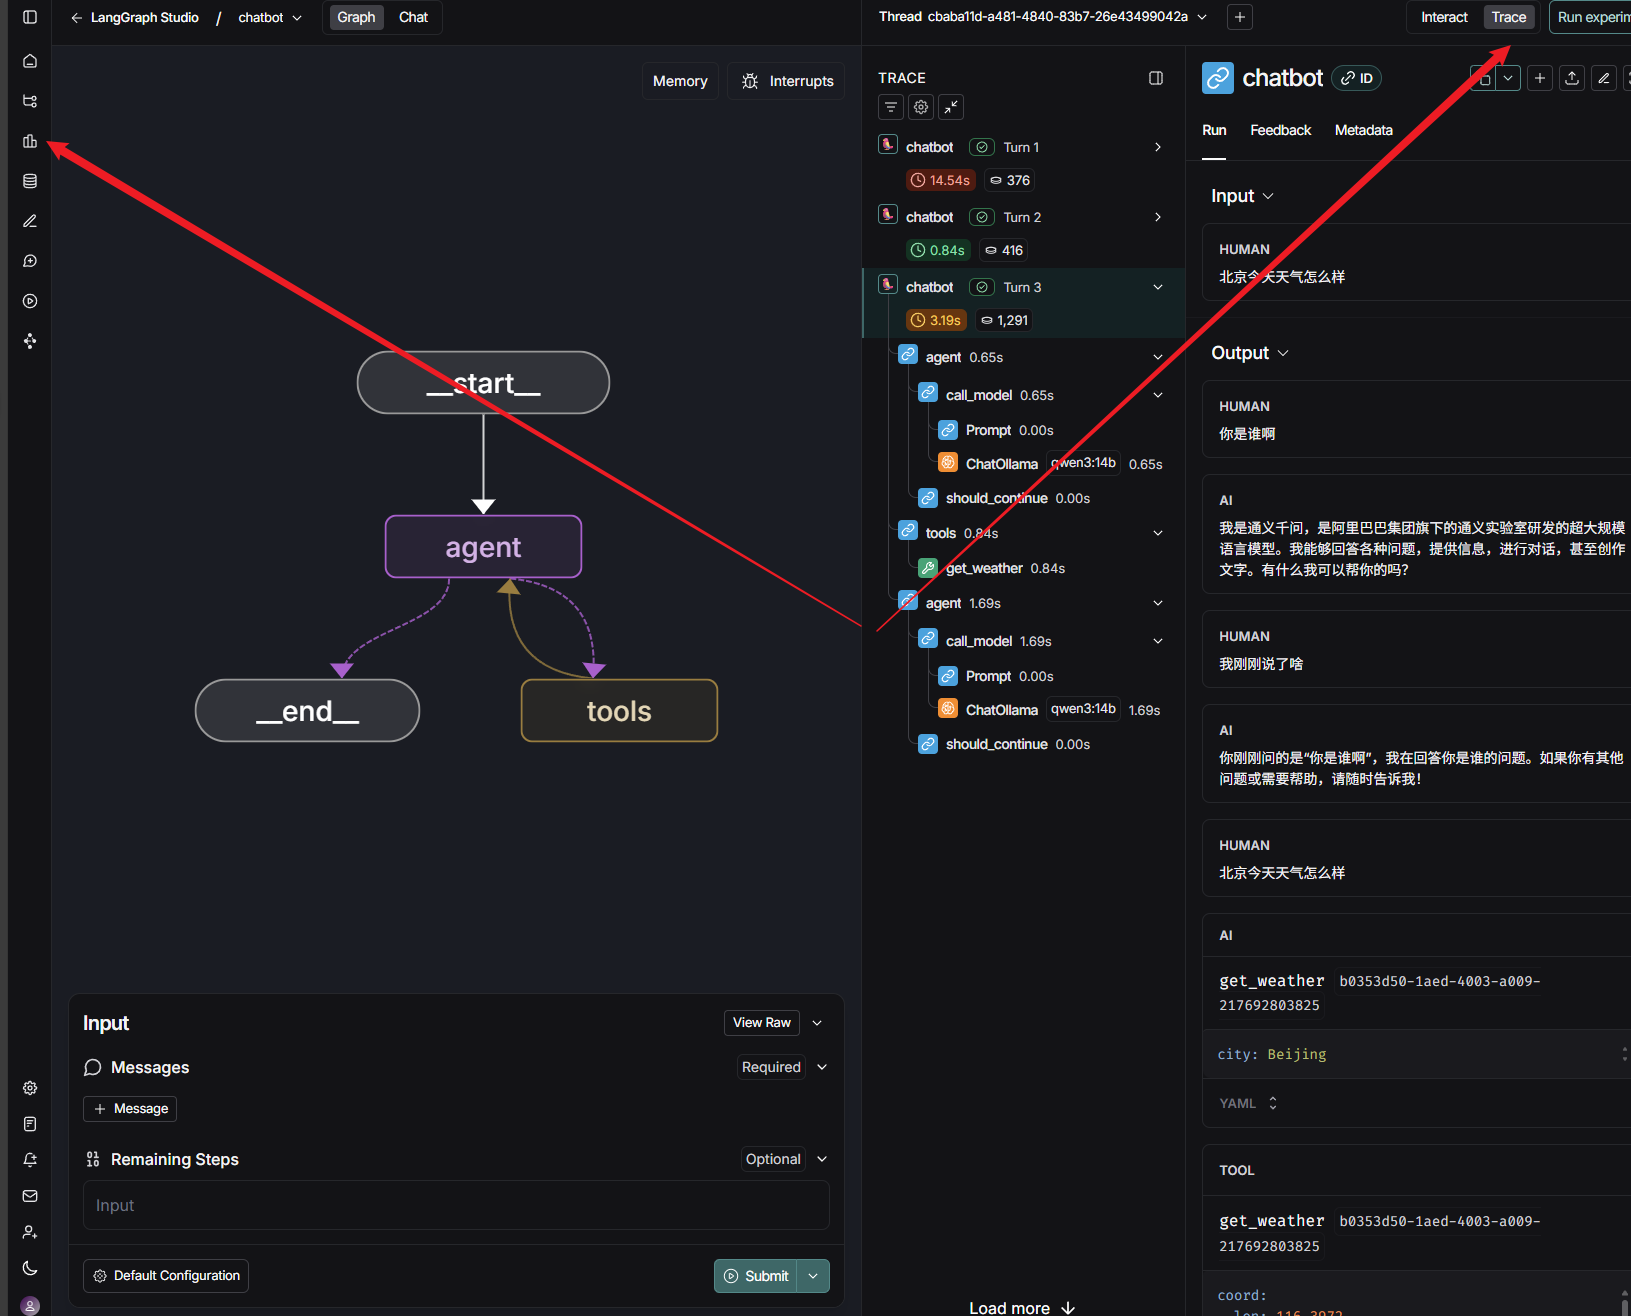
点击`LangGraph Studio`侧边栏的`Tracing Projects`按钮,然后点击我们的项目`langgraph_studio_chatbot`,可以看到LangSmith的调试记录:
### 4.3 LangSmith 追踪
点击`LangGraph Studio`侧边栏的`Tracing Projects`按钮,然后点击我们的项目`langgraph_studio_chatbot`,可以看到LangSmith的调试记录:
 ### 4.4 Agent Chat UI 前端交互
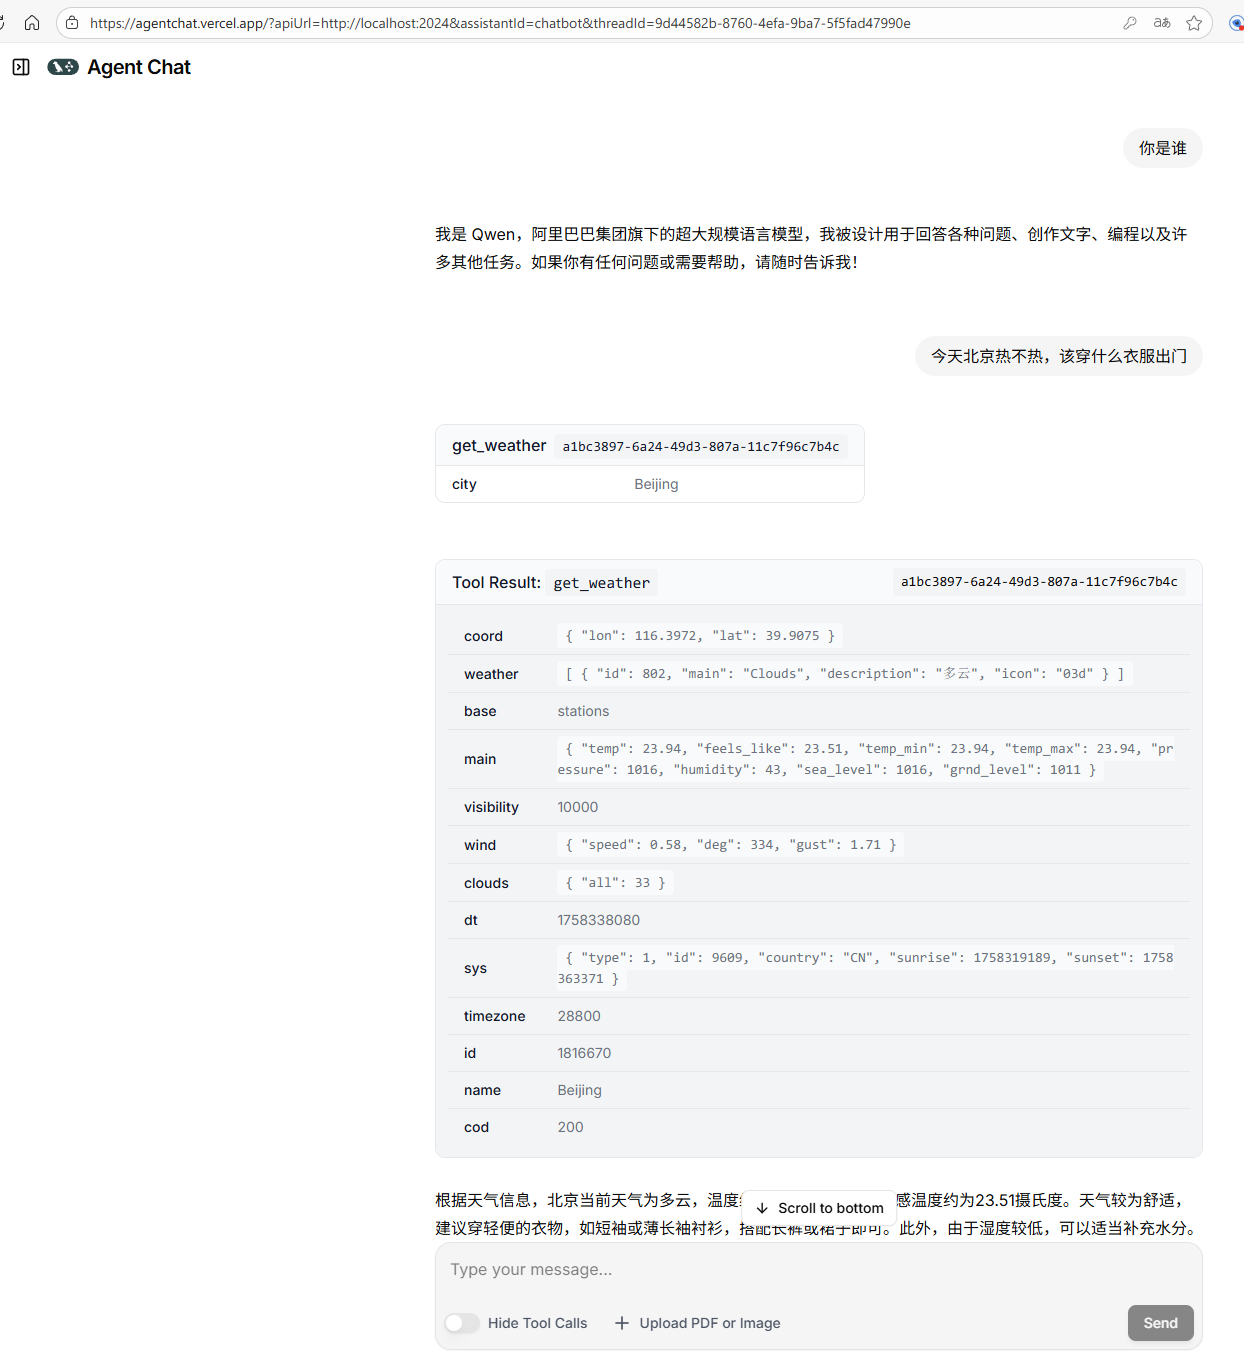
除了使用LangGraph Studio 调试交互外,我们也可以使用Agent Chat UI 进行交互,项目主页:[https://github.com/langchain-ai/agent-chat-ui](https://github.com/langchain-ai/agent-chat-ui)。项目提供本地部署和在线使用两种方式,为方便调试,此处以在线使用为例演示
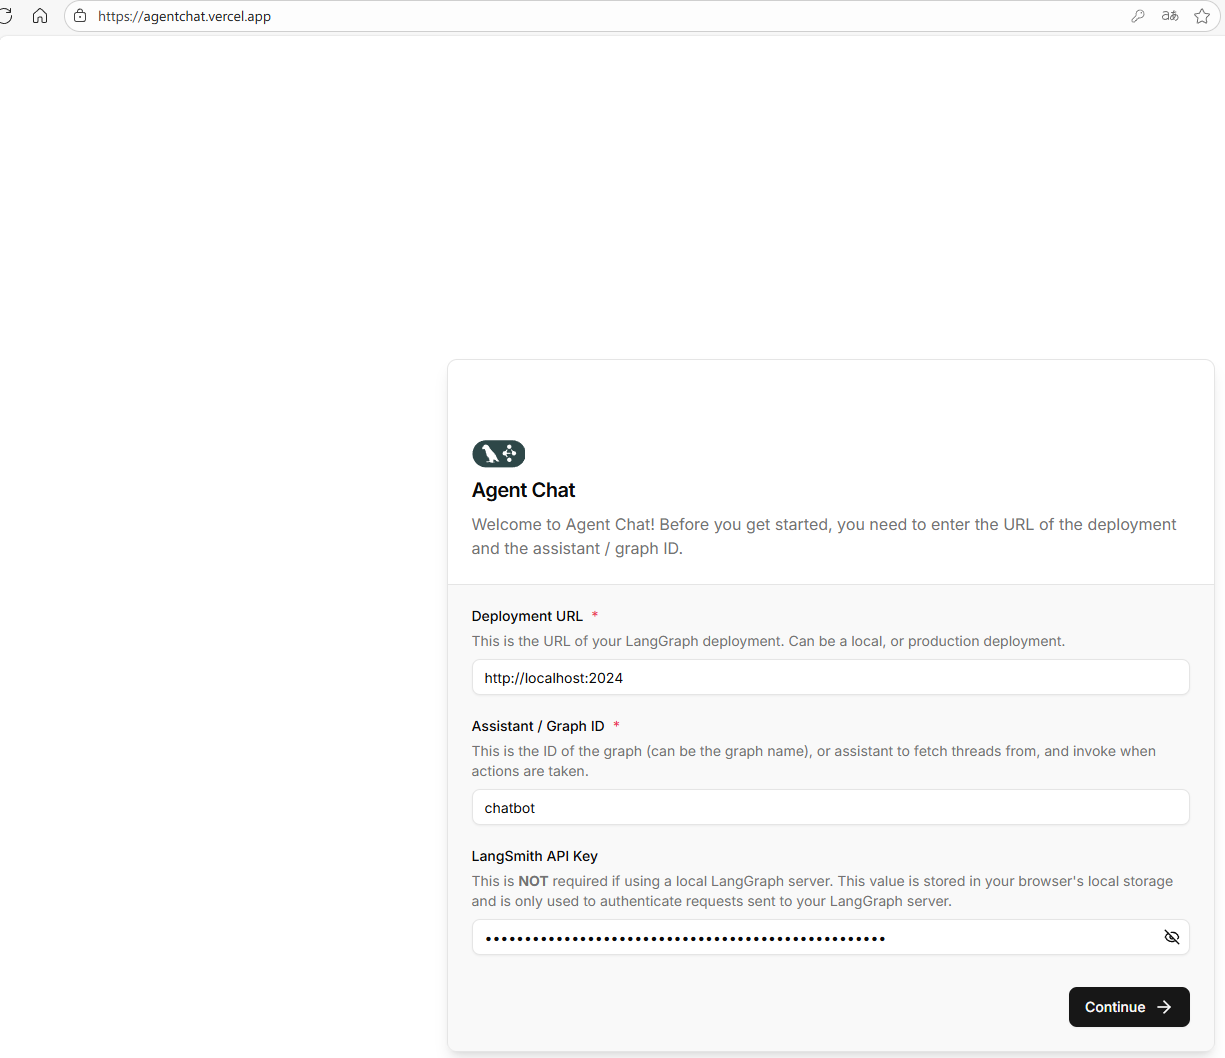
访问[https://agentchat.vercel.app/](https://agentchat.vercel.app/),填写相关信息
### 4.4 Agent Chat UI 前端交互
除了使用LangGraph Studio 调试交互外,我们也可以使用Agent Chat UI 进行交互,项目主页:[https://github.com/langchain-ai/agent-chat-ui](https://github.com/langchain-ai/agent-chat-ui)。项目提供本地部署和在线使用两种方式,为方便调试,此处以在线使用为例演示
访问[https://agentchat.vercel.app/](https://agentchat.vercel.app/),填写相关信息
 聊天测试进行功能验证